I write a lot of Python, but I wanted to get back into practice with a lower-level language. I've done a decent amount of C and C++ programming, but it seems like everyone who tries Rust really likes it so I took it for a spin.
You can find my code for this project on GitHub.
Learning Rust
The first step was to learn a bit about Rust. I started how they recommend on rust-lang.org, by reading The Rust Book.
Next I worked through all the excellent exercises in the Rustlings Course.
Finally, I picked a couple projects:
- I wrote a simple shell in the spirit of an assignment I found from a CS course at my alma mater
- I wanted to do something more visual; I work in medical imaging and enjoyed computer graphics class in grad school. I happened to catch a talk by Peter Shirley at Nvidia's GTC '21 called Ray Tracing in One Weekend. I found out that's actually part of a series of great books and I was off and running.
Ray Tracing in Rust
Ray Tracing in One Weekend is somewhat like a tutorial, but it's intentionally general to allow freedom in selection of programming language and certain implementation details. It's really a great framework for non-copy-paste learning. On top of that, graphics programming is a great tool for learning a language because you can do visual debugging and get the satisfaction of making an image (as opposed to, say, calculating the Fibonacci sequence).
I was also drawn to Rust with some interest in WebAssembly (aka wasm). That was intended to be a larger part of this project, but I ended up hitting some performance bottlenecks early that made it less fun. I may revisit this because having a live demo is pretty cool, but for now I have decided to proceed with the rest of the rendering features first. Perhaps I'll write more on this later.
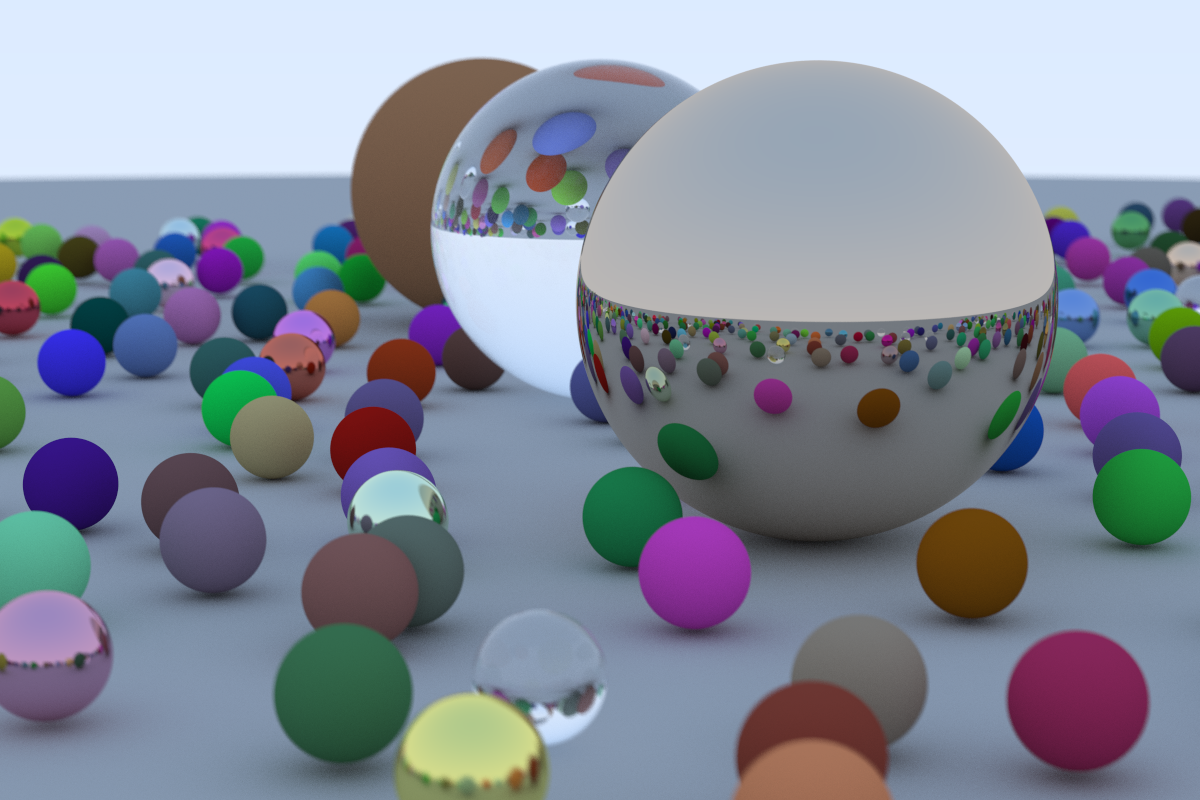
As a teaser, here's the final render from my implementation of the first book. This image is 1200x800 with 500 samples per pixel, and the render took about 6 minutes on my 2019 MacBook Pro 2.3 GHz 8-Core Intel Core i9.
The Vec3 Class
We're talking 3D graphics, so we'll need 3, uh, dimensions. The first step is making a very simple struct to hold a 3D vector or point.
pub struct Vec3 {
    pub x: f32,
    pub y: f32,
    pub z: f32,
}
pub type Point = Vec3;
Rust is easy!
Or is it? What if we want to be able to add two of these together? An interesting thing about Rust is that you don't overload operators on a struct (which is close enough to a class for now) but for the struct.
use std::ops;

impl ops::Add for Vec3 {
    type Output = Self;

    fn add(self, rhs: Self) -> Self {
        Self{x: self.x + rhs.x, y: self.y + rhs.y, z: self.z + rhs.z}
    }
}
That's neat! This is called a Trait and it is a really useful and flexible paradigm. Hopefully I can demonstrate later how this pattern encourages composition over inheritance which is something you hear often, but working with Rust has helped me understand much better. (This is the carrot; Rust not supporting inheritance is the stick.)
Something that is really neat about traits: you can implement them on types you didn't define, including standard types. That's how we can implement commutative addition with our Vec3 and floats. It's a little verbose, but also pretty clear:
impl ops::Add<Vec3> for f32 {
    type Output = Vec3;

    fn add(self, rhs: Vec3) -> Vec3 {
        Vec3{x: self + rhs.x, y: self + rhs.y, z: self + rhs.z}
    }
}

impl ops::Add<f32> for Vec3 {
    type Output = Self;

    fn add(self, rhs: f32) -> Self {
        Self{x: self.x + rhs, y: self.y + rhs, z: self.z + rhs}
    }
}
Of course, you can also implement methods for the struct that don't come from
any traits. Ultimately this is just allows us to call functions with
foo.bar(baz) instead of bar(foo, baz) but it is handy and familiar.
Implementing this way also allows eliding some of the type annotations, so the
function definitions look a little nicer as well. It's also a decent way to
group related functions even if they don't make use of self.
impl Vec3 {
    pub fn dot(&self, other: &Self) -> f32 {
        self.x * other.x + self.y * other.y + self.z * other.z
    }

    pub fn cross(&self, other: &Self) -> Self {
        Self{
            x: self.y * other.z - self.z * other.y,
            y: self.z * other.x - self.x * other.z,
            z: self.x * other.y - self.y * other.x,
        }
    }

    pub fn length_squared(&self) -> f32 {
        self.x * self.x + self.y * self.y + self.z * self.z
    }

    pub fn length(&self) -> f32 {
       self.length_squared().sqrt()
    }

    pub fn unit(&self) -> Self {
        *self / self.length()
    }
}
Note I did this all hard-coded for single-precision f32 values, but Rust also
supports generics. I haven't really dived into that yet.
This Vec3 class could also be used for colors, but I didn't see a way to rename
fields but keep the field types so unfortunately I reimplemented a lof of this
for colors. I also initially started with RGBA u8 colors, but eventually
reverted that as it was finicky and against the grain of the book.
Next time
That's enough for today. The next post will cover my implmentation of the rays we will be shooting into the scene.